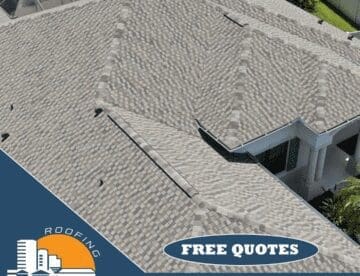
Asphalt shingles have been manufactured since the early 1890s. Around 70% – 80% of all roofs in the United States are covered with asphalt shingles. Asphalt shingle roofs are relatively inexpensive, easy to install, and require little maintenance. The normal life expectancy of an organic asphalt shingle roof is 15 to 20 years. Heavyweight laminated fiberglass shingles will last 20 – 30 years.
Organic Shingles
The base ,at of organic-based asphalt shingles was originally composed of cellulose fibers made from recycled paper or wood chips, and cotton or wool fibers made from rags. Now its made of a tough asphalt-saturated roofing felt, coated on both sides with asphalt.
The base mat gives shingles their strength. The base material is saturated and covered with as high melting point flexible asphalt called a saturant. The saturan is reinforced with mineral stabilizers such as ground limestone, slate, trap rock or other inert materials such as ceramic-coated on the exposed face. This gives the shingle its color and helps it resist weather and fire.
The materials most often used for coarse mineral surfacing are natural colored slate, natural colored rock granules, or ceramic-coated rock granules. The back of each shingle is covered with talc, sand or mica to prevent shingles from sticking together in the bundle.
Fiberglass Shingles
Fiberglass shingles first appeared in the late 1950s. By the late 1970s they had improved so much they were as good as traditional asphalt shingle. Fiberglass shingles have fiberglass base mat saturated and covered with flexible asphalt and surfaced with mineral granules. They weight and thickness of a fiberglass mat is usually much less than a cellulose-fiber mat. Fiberglass shingles contain more asphalt than organic-based asphalt shingles.
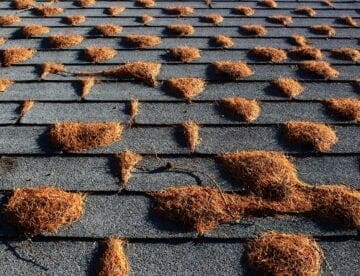
Nowadays, organic shingles aren’t used very often. They soak up water from underneath, which makes the corners at the bottom of the tabs curl up.
UL Ratings for Shingles
The Underwriters’ Laboratory is a non-profit organization founded in 1894 under the sponsorship of the National Board of Fire Underwriters. The UL has the most widely-accepted standards for the fire resistance of building materials. The UL classifies a firep resistant shingle as A B, or C. Clas A shingles withstand severe fire exposure. Class B shingles withstand moderate fire exposure and Class C, light fire exposure. With all threee ratings, “exposure” means exposure t fire that comes from sources outside the building. To quality for any UL classification, a shingle mush not:
a) disintegrate and fall off the roof as glowing brands
b) break, slide, warp, or crack, exposing the deck
c) allow the roof deck to fall away as glowing particles
d) allow continued flaming beneath the roof deck
To bear a UL “wind-resistant” label, a shingle must withstand winds ups to 63 miles per hour for 2 hours without a single tab being uplifted.
To increase their wind resistance, many asphalt shingles come with a self-sealing thermoplastic adhesive strip (tar strip) above the cutouts on the face of the shingle. Heat from the sun makes the strip sticky and helps to bond in cold weather or when the roof is shaded, has a low slope, or faces north or east.
The best temperature rance for installing asphalt shingles is between 40 degrees Fahrenheit and 85 degrees Fahrenheit. Before you install asphalt shingles during cold weather, store the shingles in a warm location or lay them in the sun until they soften up.
Deck Requirements
Asphalt shingles require a solid roof deck. As a general rule, you can install asphalt shingles on roof slopes ranging from 4 in 12 through 21 in 12 using standard application methods. You can also install asphalt shingles on slopes as flat as 2 in 12, or steeper than 21 in 12, but you’ll have to follow special application procedures.
Roofs with 2 in 12 to 4 in 12 pitch can have shingles installed however they need to be installed using a low slope application. Sloped roofs that are less than 2 in 12 require a roof covering other than shingles such as roll roofing.
Shingle Colors
The colors of the shingles you use can dramatically affect the appearance of a building. For example, a light colored roof directs the eye upward and fives the illusion of spaciousness. Dark colors create the opposite effect. In the case of a large, steep roof, you can use that illusion to scale down the roof structure and make the building look more proportional and attractive.
Asphalt Strip Shingle
The most widely-used type of asphalt shingle is the 3-tab strip shingle. This is also known as the square-butt or thick-butt shingle because some manufacturers make shingles thats thicker at the butt edge. Cutouts (also called keys, waterlines, bond lines, tab notches, and water jackets) make a roof look like its finished with many smaller units.
You can also find 2-tab (twin-tab) strip shingles, strip shingles with no cutouts, and shingles with as many as five tabs (random tab strip shingles). Some shingles have staggered butt lines. Shingles whose tabs are all the same size are called square-tab shingles. Strip shingles with more than one layer of tabs are called laminated, dimensional, or three-dimensional shingles. These shingles create extra thickness and give a three dimensional effect. Other strip shingles include 2- and 3-tab hexagon shingles.
Asphalt strip shingles weigh from 135 to 390 pounds per square depending on:
- the shape of the shingle
- the thickness of the base matt
- the amount of asphalt absorbed by the base mat
- the thickness of the asphalt coating
- the amount of surface material pressed into the exposed face.
Asphalt shingles are from 35-5/16 inches to 42 inches long, and from 12 to 14-1/8 inches wide. They have recommended exposure of 4 to 6 inches. (Exposure is the part of the shingle not covered by the next course of shingles.) The most common asphalt strip shingle is 3 feet by 1 foot laid at a 5-inch exposure.
There are also several types of individual asphalt shingles, including hex shingles, interlocking shingles and giant individual shingles.
Installing Asphalt Shingles
After the underlayment, drip edge and valley flashing has been installed, you’re ready to install a starter course at the eaves of the roof. The starter course protects the eaves of the roof by filling in the spaces under the cutouts and joints of the first course of shingles. Without a starter course, there would only be shingle coverage at the eaves. Install the starter course with a 1/4-to-3/8-inch overhand at the eaves and rakes.
Roll Roofing Starter Course
You can install a starter course by using a 7-inch-wide (minimum) strip of mineral-surfaced roll roofing whose color matches the shingles. Place the starter roll along the eaves with a 1/3 – to – 3/8-inch overhang and nail the strip on 12-inch centers. Drive the nails along a line 3 to 4 inches above the eaves. If you’re installing the starter roll over board sheathing, stagger nail to prevent a board splitting. That means don’t hammer nails in a straight line along the grain of a board.
Roll roofing comes in 36-foot lengths. If you need more than one strip to cover the length of the eaves, lap the end joint at least 2 inches. Nail the underlay, then embed the overlap in roofing cement and nail it in place with three nails.
Shingle Starter Course
Most strip shingle manufacturers recommend that you make the starter course by cutting off the shingle tabs and installing the shingles with the factory-applies adhesive along the eaves.
Trim about 3 inches from the end of the first course of shingles to keep the joints of the first course of shingles from lining up with the joints of the starter course shingles. Position the starter-course shingles along the eaves with a 1/4-to 3/8-inch overhang. Drive nails into the shingles along a line 3 to 4 inches above the eaves. Position the nails so that they won’t be exposed under the cutouts of the shingles in the first course. Stagger nail the starter-course shingles over board sheathing.
If you use roll roofing or shingles that don’t have a factory-applied adhesive strip (free-tab shingles) for the starter course, bond the tabs of each shingle in the first course to the starter strip. Use a spot of roofing cement about the size of a quarter beneath each shingle tab. Install all free-tab shingles this way in high-wind area. That includes the starter course, even when you use shingles that do have factory-applies adhesive strips.
Start with a Straight Line
It is very important that you install the starter course and first course of asphalt shingles straight. To align asphalt shingles, nail down a shingle with the correct overhang on each end of the eaves. Snap a chalk line along the top edges of the shingles. Then line up the top edges of intervening shingles along the chalk line. Repeat this alignment every third or fourth course. Measure from the eaves up to the butt position for the next course of shingles at the rakes. Install the end shingles, then snap another chalk line to align that course.
You can save time by snapping all the chalk lines before you install any shingles. Snap horizontal chalk lines on 5-inch centers (assuming 5-inch shingle exposure), allowing for the overhang at the eaves. Then snap vertical chalk lines on 6-, 12- or 36-inch centers, depending on how good you are at eyeballing a straight line. Once you’ve done this, you can line up shingles at the correct positions with the proper exposure without having to use the exposure gauge on your hatchet. Be sure to allow for the requires overhang when you snap your chalk lines.
For example, if your exposure is 5-inches, with a 1/4-inch overhang, snap your first horizontal chalk line at 11-3/4 inches from the edge of the eaves. Snap succeeding chalk lines 5 inches apart.
To maintain the correct exposure for square-tab strip shingles, align the butts with the top of the cutouts in the course below since the cutouts in these shingles are 5-inches deep.
- Shingle Patterns There are three basic shingling patterns used to instal 3-tab asphalt strip shingles:
- joints broken into halves, or the 6-inch pattern (half pattern)
- the 5-inch pattern (random pattern)
- joints broken into thirds, or the 4-inch pattern
To install the 6-inch pattern, start the first course with a full-length shingle. Remove 6 inches from the first shingle of the second course. Then remove 12 inches from the first shingle of the third course. Continue, removing an additional 6 inches from the first shingle of each course until you begin with a full shingle again on the seventh course.
Save the full tabs you cut off and use them for hip and ridge units, filler tabs adjacent to valleys, and at the opposite ends of a gable-framed roof. The 6-inch pattern is the simplest style to install. But, because you align the cutouts every other course and the shingles vary slightly in size, you must snap chalk lines up the roof slope so you can align the edges of the shingles to keep the cutouts line up vertically. The easiest way to install the 6-inch patter on a gable roof is to shingle up the rake and install each course only far enough over the deck to start a pattern. when you get to the ridge, return to the bottom and finish out each course across the roof, working your way up the slope. This method of shingling up the rakes followed by shingling across the roof is called the diagonal method.
If the top of a shingle extends beyond the centerline of the ridge, lap the shingle over the ridge and nail it on both sides of the ridge.
The 5-inch pattern is often called a random pattern. This pattern gives you some flexibility when you align the cutouts up the roof slope. Start the first course with a full-length shingle. Remove 5 inches from the first shingle of the second course. Then remove 10 inches from the first shingle of the third course. Continue removing an additional 5 inches from the first shingle of each course until you begin with a full shingle again on the eighth course. (You don’t start the eight course with a 1-inch section). Use the exposure gauge on your hatchet to measure the 5-inch increments. On gable roofs, shingle up the rake to the ridge, as with the 6-inch pattern, then return to the bottom and finish out each course across the roof, working your way up the slope.
You’d usually use the 4-inch patter only on low-sloped roofs ranging from 2/12 to 3/12. Trip the first shingle of each course in a multiple of 4 inches, beginning again with a full-width shingle at the 10th course.
The 5-inch pattern is sometimes used on hip roofs, while the 6-inch pattern is generally used on gable roofs. Never install a shingle pattern less than 4 inches because the cutouts and joints would be so close on adjacent course that leaks could occur.
Shingle Application
The order you follow to install shingles depends on the roof style. On gable roofs broken by dormers or valleys, start shingling at the rake and proceed towards the breaks. On simple gable roofs, start shingling at the gable end that’s most visible to passers-by. On hip roofs and roofs where both gable ends are equally visible, start shingling at the center of the roof and proceed in both directions. In this case, set all your chalk lines (for the offset pattern you’ll use) before you begin shingling.
On hip roofs, lap shingles over the hips from both sides. Then cut the shingle edges of the upper layer in line with the centerline of the hip.
Dormers
If there’s a dormer, shingle the top of it first. Then bring the shingles of the main roof up to and alongside the dormer, all the way to the ridge of the dormer. Extend one shingle course on the main roof on one side of the dormer to a distance at least one shingle beyond the ridge of the dormer roof.
Snap vertical chalk lines down from the ridge starting with the edge of the extended shingle. Use those chalk lines as guides to align the shingle courses as you install them on the right side of the dormer. Slip the last shingle course under the course that’s in line with the ridge of the dormer Aligning shingles on both sides of a dormer this way is called “tying in.” You’ll have to shingle the ridge of the dormer before you finish the main roof above the dormer.
No matter where you begin shingling, roofing materials manufacturers recommend you apply the shingles in the diagonal pattern. Then you’ll be sure you’ve nailed every shingle properly because you can see each one until you cover it with the next course above.
You can also use the straight-up method (racking) method. But then you have to install some shingles under shingles you’ve already laid in the course above. Since part of the underlying shingle is hidden, there’s a possibility you could miss nailing that part of the shingle.
Some roofing contractors prefer the racking method because it’s a more accurate way to align the shingles. You use the horizontal chalk lines and previously-laid shingles edges as guidelines. If you use this method, snap horizontal chalk lines on 5-inch centers starting at the eaves and allowing for an overhang. Then, snap two vertical chalk lines 6 inches apart. Install shingles up the roof offsetting every other course 6 inches, aligning them with the vertical chalk lines. Then shingle the rest of the roof the same way, using the horizontal chalk lines and previously-installed shingle edges as guidelines.
Patterning
Offset the joints in adjacent courses of 3-tab shingles to keep water from being channeled through the joints, where it can get under the shingles. Offset the joints of laminated shingles for the same reason.
To form a random pattern, start the first course at the rake with a full-length dimensional shingle. Then remove 4 inches from the first shingle of the second course, and 11 inches from the first shingle from the third course. Start the fourth course with a full-length shingle and repeat the pattern every third course. Finish the remainder of each course with full-length shingles.
By using this method, you won’t get an obvious and unattractive repeated pattern thought the roof. If you install dimensional shingles using the 6-inch pattern, you’ll get repeated diagonal trails. If you install dimensional shingles using the racking method you’ll get repeated vertical trails.
Shading
Asphalt shingles sold as one color won’t match perfectly. Some will look lighter or darker than others. This is called “shading” and it’s due to the way they were made. It can also happen if the shingles have been stored too long, or in stacks so tall that backing materials of one shingle rubs off onto the face of another. If you use the racking method, (straight-up application) you’ll accent the shading. Use the diagonal method of application to help blend the shingles.
Low or High Slopes
In general, install asphalt strip shingles only on roof slopes of 4/12 and steeper. You can install square-tab shingles on slopes as low as 2/12 (but never lower) if you follow special application procedures. The primary requirement is that you install the proper underlayment and eaves flashing (if required) to prevent damage cause by ice dams. Also, for added wind resistance, use shingles with self-sealing factory-applied adhesive strips or apply a spot of roofing cement about the size of a quarter under every shingle tab. Use cement sparingly. Too much cement can cause blisters.
Normally, you don’t install asphalt strip shingles on roof slopes steeper than 21/12. The main problem is that the factory applied self-sealing adhesive strip isn’t very effective, especially on colder or shaded portions of the roof. However, you can install asphalt strip shingles on steeper slopes if you follow modified application procedures. Depending on the manufacturer’s specifications, install each shingle with 4 to 6 fastners.
Use roofing cement to attach shingle tabs to underlying shingles. Apply the cement in spots about the size of a quarter.
- For shingles with three or more tabs, apply a spot of cement under each tab.
- For two-tab shingles, apply two spots of cement under each tab.
- For no-cutout shingles, apply three spots of cement under the exposed portion of each shingle.
Installing Asphalt Strip Shingles in Valleys
The three main types of valleys are:
- open valleys
- closed-cut valleys (half-lace)
- woven valleys (full-lace)
The valleys of aggregate-surfaced roofs are usually made of underlayment covered with aggregate embedded in bitumen. Never install a vent pipe or any other roof penetration in a valley.
Open Valley
It is not recommended to use open valleys of roofs with 3-tab shingles. Open valleys are more likely to leak than other types of valleys. The valley can get clogged by leaves, twigs, pine needles or other debris and cause a backup. Or water may be forced up under shingles adjacent to the valley during a heavy rain.
To construct an open valley, install shingles at the upper end of an open valley up to within 3-inches on each side of the centerline of the valley. Widen this distance by about 1/8-inch per foot going down the valley. You need to make this area wider because, as a stream of water flows down a valley, the stream will get wider. This widening is helpful because it lets ice free itself and slide down the valley as it melts.
Trim 1 to 2 inches from the upper corner of the last shingle in each course in the valley at a 45-degree angle. This is to direct water into the valley and not between the shingle courses. That’s called “dubbing.” In addition, you should cement the end of the shingle to the valley flashing with a 3-inch width of roofing cement. Don’t allow exposed nails along the valley flashing. I also recommend dubbing-off and cementing shingle corners in closed-cut and woven valleys.
Open Valleys at Dormer Roofs
Install dormer valley flashing after you’ve installed the shingles on the main roof deck up to a point just above the lower end of the dormer valley. Then install the valley flashing. Trim the lower part of the flashing so that it goes at least 2 inches below where the two roof decks meet. Also, trim the flashing so it overlaps the uppermost shingles (the ones you installed before) down to the top of the cutouts. In addition cut a small arc in the flashing where the dormer and main roof decks meet. Overlap, trim, cement, and nail down the upper part of the flashing above the dormer ridge. Then install shingles over the main roof deck and dormer roof.
Closed-Cut Valley
Most roofers prefer the closed-cut (half lace) valley over the woven valley because it looks neater and more professional. And, you can usually install this type of valley faster because you can shingle each side of the valley independently.
Install each shingle course along the eaves of one side of the valley and at least 12 inches across to the other side. Make sure the shingle end joints are at least 10 inches from the centerline of a closed cut or woven valley. To keep a joint from ending up in a valley, insert an individual 12-inch-wide tab within a shingle course on either side of the valley. Use two fasteners to secure the end of each shingle you install across the valley. Next, apply shingles to the other side of the valley, extending them beyond the valley and over the shingles you just laid. Then, trim the overlying shingles back 2 inches from the centerline of the valley. Snap a chalk line and use it for a cutting guide. Also, trim 1 inch from the upper corner of the last shingle in each course at a 45-degree angle to direct water into the valley and not between the shingle courses. In addition, cement the end of the shingle with a 3-inch width of roofing cement.
Woven Valleys
To install shingles into a woven (full-laced) valley, apply them alternately to both sides of the valley. Extend the shingles across the valley, and at least 12 inches on each side. As with a closed-cut valley, be sure the shingle end joints are at least 10 inches from the centerline of the valley. Also, secure the end of each shingle that goes across the valley with two fasteners.
It’s best to use woven valleys only when the roof slope is 3/12 or steeper. Even though you don’t have to trim the shingles when you make a woven valley, it’ll still take you longer to install it. That’s because you have to work both sides of the valley because it doesn’t look clean and professional.
Ridge and Hip Units (Cap Shingles)
Some asphalt shingles come with a prefabricated ridge roll or prefabricated individual 12″ x 12″ units. The advantages of the prefab units is that they save you time – all you have to do is install them. Sometimes, when you use laminated 4-tab and 6-tab shingles, you also need to use special hip and ridge shingles. You can field-fabricate the cap shingles from the same material as the rest of the roof, but the factory-supplied units save time.
With 2- and 3-tab shingles, or shingles with no tabs, you can cut hip and ridge unit from standard shingles. Cut a 3-tab shingle down to the 12″ x 12″ units. TO get neat, professional look, taper the lap portion of each unit so it’s slightly narrower than the exposed part. To make cap shingles from 2-tab or no-tab shingles, trim units to a minimum of 9″ x 12″. Salvage parts of shingles left over from the rakes, hips, and valleys, and make them into cap shingles.
Install the hip units before you install the ridge units. Start shingling the hips at the eaves and work up slope toward the ridge. In high-wind areas, use roofing cement to secure the first hip unit. Trim the first hip unit so its edges overhang the eaves by 1/4″ to 3/8″, depending on the overhang you allowed for the starter course. Then temporarily tack another hip unit at the top of the hip. Snap a chalk line down the hip aligned with one or both edges of the two units as a guide for intervening hip units. Trim the top hip units where they meet the ridge.
To cap the end of a ridge above the hips, nail down the end ridge shingle and cut about 6-inches through the center of the shingle tab. Then nail down one flap, and fold the opposite flap down into a bed of roofing cement to cover the nail and seal the hip-ridge junction.
On a gable or hip roof, install ridge units at opposite ends and snap a chalk line along one or both edges to align the intervening ridge units. Install ridge shingles over a gable roof beginning at the end of the roof facing into the wind. Install ridge shingles on a hip roof starting at both ends and working toward the center of the ridge. You can also follow this procedure on a gable roof. When you reach the center of the ridge, trim a shingle to use as a cap over the last ridge units. Nail the cap and cover the nails with roofing cement.
Install hip and ridge units at a 5-inch exposure. Secure each unit with two fasteners, one on each side. Drive the fasteners 5-1/2″ inches back from the exposed end and 1 inch up from the edge of the shingle.
On dormers, install the ridge units starting at the front of the dormer and working toward the main roof. Extend the last unit you install at least 4-inches onto the main roof. Split the part of the shingle that extends over the main roof down the center and nail it into place. Then cover this last dormer shingle with shingles you apply to the main roof. If a cutout in a main roof shingle falls over the dormer ridge shingle, coat the dormer shingle with roofing cement under the main roof shingle. To provide extra waterproofing at the place where the dormer ridge and the main roof meet, install 6-inch-wide strips of water shield material between the last dormer ridge unit and the shingle beneath.